what to do with honeycomb in honey jar
When we started beekeeping this jump, I knew one of the benefits would exist harvesting our own beeswax. I looked forward to the day I wouldn't take to buy beeswax to apply in our homemade lip balm and dandelion save. What I didn't know this jump was exactly how we would harvest or process the beeswax. I started researching information technology and asked around. What I plant out is that learning how to render beeswax from honeycomb is like shooting fish in a barrel!

This post may incorporate chapter links. I receive a small commission when a product is purchased through these links, at no additional charge to you lot. Thank y'all for your support!
In one case a week my hubby goes out to to our beehives to exercise a hive inspection. Anytime he finds honeycomb that the bees built in odd places he removes it. Sometimes they start building rummage on top of the frames. One other time the bees started building comb out so far they attached the frame to the inside of the box.
When he removes the honeycomb, he puts information technology in a glass jar. He has been collecting the comb for the final few months and we had a decent pile built upwards. I want to make some more than medicinal salves and need beeswax so figured information technology was the perfect time to endeavor rendering our ain beeswax.
How to Return Beeswax
This whole process took me about thirty-45 minutes and then some other few hours for the wax to cool. This is a ane step filtering process and then there is no need to melt the wax downwardly and filter information technology more than once. I read a few online tutorials on rendering beeswax that were very fourth dimension intensive and required melting the beeswax down two times. Once it was melted straight into a pot of h2o and large debris scooped out with a slotted spoon. The second time the beeswax was melted downwardly, it had to be poured through a slice of cheesecloth to strain it. That sounded way too time intensive for me! The method we used is much easier and quicker to return beeswax from honeycomb.
Materials needed:
-old large metallic pot (you will finish up with some wax on it so you probably don't desire to use your all-time cooking pot!)
-fine cheesecloth (this is the kind we apply)
-honeycomb
-chip clip or twisty tie
-metal tongs
Pace i:Lay a large piece of cheesecloth on a apartment surface. Place the honeycomb in the eye of the cheesecloth. It doesn't matter if there is debris like dead honeybees mixed in with the honeycomb since the beeswax volition exist filtered out.

Wrap the cheesecloth effectually the honeycomb forming a bundle with all ends of the cheesecloth gathered snugly in your paw. Use a chip clip or twisty tie to secure all the ends of the cheesecloth together. Make sure the ends of the cheesecloth are clipped tight then no debris leaks out into the filtered beeswax.
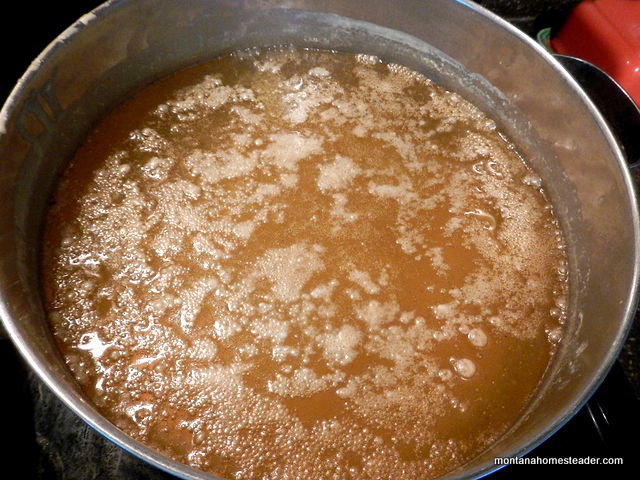
 Step 2:Fill the pan with water and place information technology on the stove. Identify the cheesecloth bundle in the water. Plough the stove on to a medium/low heat. Equally the water heats, the beeswax honeycomb with showtime to melt and seep out of the cheesecloth leaving the debris on the inside of the cheesecloth.

Every bit the beeswax starts to melt, you will meet the yellow liquid wax floating in the h2o.

Pace three: Once about of the wax appears to have melted out of the cheesecloth bundle, yous tin can use a pair of tongs to clasp the small bundle left. This will help extract the last of the beeswax from the bundle.

Step iv:Remove the cheesecloth from the pot of melted beeswax and water. Allow the pan and contents to cool, which tin can have a few hours. The beeswax will form a layer on meridian of the water when it is melted. Every bit it cools, it will form a solid layer of beeswax on top of the water. Ours had some niggling bubbles on meridian that were formed when heating information technology. These cooled off and solidified.
 Step 5:After the beeswax cools and hardens on tiptop of the h2o, gently push down the edges of the beeswax. It will separate from the pan. Remove the solid round of beeswax from the pan. Ours had a few air bubbles on the bottom layer that had water trapped in them. I popped the air bubbles and laid the beeswax on a cloth towel on the counter to dry out. Now you take a beautiful round of filtered beeswax rendered from your very ain honeycomb!
 If you're like me and curious to come across what was left within the cheesecloth, open it upwardly and take a peek! Ours had mainly honey bee body parts that were stuck in the comb along with another random droppings. We'll probably have more honeycomb to return more beeswax in the next few months. Instead of throwing out the cheesecloth, I placed information technology in a paper bag in the pantry and program to reuse it next time we render beeswax.

Now that we have a nice round of filtered beeswax, my next projection is to employ it to make some homemade medicinal salves like dandelion salve and medicinal yarrow offset aid salve.
May 2015 update:
Since I posted this last year, we've rendered more beeswax from our honeycomb. This week we processed a large batch of comb saved upward since the end of last summer. In the pile was a bunch of night colored brood rummage. Some of it even had dead larva in it. We weren't sure if we could (or should!) process this into beeswax. I did a quick internet search and read that some people don't bother with it since supposedly it does not accept as much wax content as honeycomb. Other folks practise procedure breed rummage into beeswax since at that place is some wax present.
Since I was already processing a big pile of honeycomb, nosotros decided to go ahead and process the brood comb too. What did we discover? Well there is definitely beeswax to be rendered simply there is too a lot of leftover grime inside the cheesecloth. When processing only honeycomb, it wasn't as well full of grime except maybe for an occasional dead bee. Since there was so much crud from the brood rummage, the one layer of cheesecloth was not sufficient to filter out all the fine dirty particles from the beeswax.
When rendering beeswax from brood comb, I highly advise doubling or even tripling the layers of cheesecloth!
I learned this the hard way. Once I discovered our beeswax had some modest particles of grime in it, I had to wait for it to solidify. So I broke information technology up into pieces and wrapped it upwardly inside two layers of fine cheesecloth and reprocessed it. We were then left with a beautiful, dark golden 1 pound block of beeswax that was nice and clean! Next time I'thousand planning to procedure beeswax and there is brood comb in the pile, I'thou going to salvage myself an extra stride and just double or fifty-fifty triple the layers of cheesecloth from the start!

Do you render beeswax and accept some tips to share?
Source: https://montanahomesteader.com/render-beeswax-honeycomb/
0 Response to "what to do with honeycomb in honey jar"
Post a Comment